Dans ce didacticiel, nous allons vous montrer comment installer SNMP sur un ordinateur exécutant Windows à l’aide de Powershell.
- Windows 2016
- Windows 2019
- Windows 10
- Windows 11
Installation de SNMP sur un serveur Windows
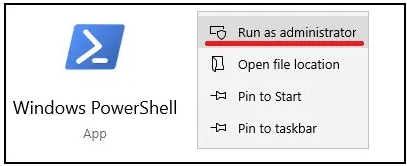
En tant qu’administrateur, démarrez une ligne de commande Powershell élevée.

Vérifiez si SNMP est déjà installé.
Get-WindowsCapability -Online -Name SNMP*
Voici la sortie de commande.
Name         : SNMP.Client~~~~0.0.1.0
State        : NotPresent
DisplayName  : Simple Network Management Protocol (SNMP)
Description  : This feature includes Simple Network Management Protocol agents that monitor the activity in network
               devices and report to the network console workstation
DownloadSize : 596276
InstallSize  : 2306716
En option, filtrez la sortie de la commande Powershell vers une version plus simple.
Get-WindowsCapability -Name SNMP* -online | Select-Object -Property Name, State
Voici la sortie de commande.
Name                        State
----                        -----
SNMP.Client~~~~0.0.1.0 NotPresent
Installez le SNMP à l’aide de Powershell.
Get-WindowsCapability -name SNMP* -online | Add-WindowsCapability –Online
Voici la sortie de commande.
Path          :
Online        : True
RestartNeeded : False
Si vous le pouvez, installez SNMP à l’aide d’une seule commande.
Add-WindowsCapability -Name SNMP.Client~~~~0.0.1.0 -online
Redémarrez l’ordinateur.
Restart-Computer
félicitations! Vous avez terminé l’installation de SNMP sur Windows 10 à l’aide de Powershell.
Source : https://techexpert.tips/fr/powershell-fr/powershell-installation-de-snmp-sous-windows/#:~:text=Tutoriel%20Powershell%20-%20Installation%20de%20SNMP%20sur%20Windows%2010,si%20SNMP%20est%20déjà%20installé.&text=Voici%20la%20sortie%20de%20commande.,-Name%20%3A%20SNMP.Client&text=En%20option%2C%20filtrez%20la%20sortie,vers%20une%20version%20plus%20simple.
